As always, Monokuma File #5 provides some information concerning the deceased. The estimated time of death is noon sharp, and as for the cause of death, the victim's wounds are telling: a large stab wound in his stomach due to a spear as well as multiple stab wounds on his thighs. There is also a laceration on his left arm and a stab wound via a knife in his right hand. Now it's time to collect some more evidence.
Goods Warehouse[edit]
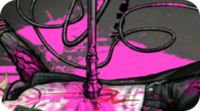
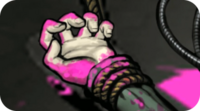
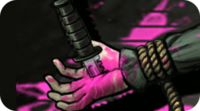
Examine the body to approach it. Examine the feet for the Torture Wounds Truth Bullet. The only lethal wound is the one in his chest, so what could have been the purpose of the smaller wounds? Was it to make him confess to something, or did the killer simply hold a grudge? Examine the spear in his chest for the Spear of Gungnir Truth Bullet. Chiaki remembers seeing it in Nezumi Castle, but the most striking thing about this spear for Hajime is the weight on its cord. One section of the cord is devoid of blood, and its size seems to indicate that someone was holding onto it. Examine the left hand and Chiaki will point out a strange blood splatter pattern, giving you the Blood on the Left Hand Truth Bullet. Examine the Survival Knife. The wound inflicted in his hand by the knife seems to match the wounds in his legs, but there must have been a reason that the spear was used for the fatal blow rather than the knife.
Examine his face and Chiaki will do her own investigation for a Duct Tape clue. Finally, examine the Burned Rope on his right wrist. The rope must have been burned by the blaze, though it doesn't make sense why his clothes is completely undamaged. Back away from the body and speak to Chiaki. She'll point out that there's Blood on the Girder high above everyone's heads. Examine the Monokuma Plushie on the floor, which has a wound that seems to mimic the dead body's. On the left of the floor, examine the Oil Lighter, which Sonia notes can keep burning even after it's been dropped. Speak to Sonia and Akane to wrap up the investigation in this area. Exit the area to investigate the rest of the warehouse.
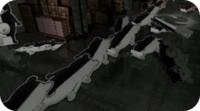
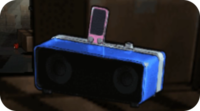
Examine the Monokuma Panels stacked atop each other in a line. Their positioning seems to indicate that Hajime and co. were the ones to knock them over when they entered the warehouse, but why were they set up like this? Examine the MP3 Player on the boxes to the right. This must have been the source of the music that the group heard earlier, but why would the killer use this to play music in the first place? Speak to Sonia for Sonia's Account. She shares the story of how she came to realize that the bombs set by Nagito were fakes. This should wrap up the investigation here, so proceed to the next area of interest: the Plushie Factory.
Plushie Factory[edit]
Speak to Sonia for Monokuma's Account. Once that's done, exit and continue right to the Military Base.
Jabberwock Military Base[edit]
Examine the truck behind Kazuichi. This is where the survival knife at the crime scene must have come from. Examine the truck to the left of Kazuichi, which is where Nagito must have gotten the bombs as per Sonia, and speak to Kazuichi before leaving. Proceed to the 4th Island to go to the next location.
Nezumi Castle[edit]
Enter the castle's interior through the hole in its wall and once inside, examine the spears on the back wall. One of the spears is missing, and the other spears on the wall match the design of the spear at the crime scene, so it's clear that that spear came from here. Still, there must have been a reason why the killer used a weapon that looks so difficult to wield to deal the fatal blow as opposed to the survival knife. Speak to Fuyuhiko before exiting, and proceed to the Hotel Site on the 1st Island. Chiaki will be standing outside Nagito's Cottage.
Nagito's Cottage[edit]

Speak to Chiaki to enter. Upon entering, pan the camera right for a view of the bathroom; Hidden Monokuma #5 can be found sitting in the bathtub. Now it's time to hunt for Truth Bullets. Examine the glowing treasure box on the table. This looks like it belonged to Monomi, so Nagito must have been the thief that Monomi mentioned to Hajime. Inside is what looks like Monomi's Notebook, which leads to an exchange that only produces more questions than answers. Examine the refrigerator to find Monokuma's Special Poison. Examine the bed to find a Gas Mask and Gloves, as well as a Piece of Blue Paper. Finally, examine the bookshelf for a scene and the Hope's Peak Academy File.
This should wrap up the investigation, and Hajime will end up on Central Island. Proceed right to Monokuma Rock to begin the trial.
