| Map Name | Initial Coordinates |
|---|---|
| hangar2 | (-63 800 -609) : 0° (facing north) |
Level objectives[edit]
The objective for this level is to locate hangar control and close the main hangar bay door.

Strategy[edit]
Although in this level there is only a modest number of enemies to kill (44 at hard difficulty) and they are not particularly challenging (mostly Gunners, Berserkers and Icarus), you often feel that they are constantly on top of you and there's no room to maneuver or take cover. So, when moving into an unexplored area, you may want to equip a powerful, close-range weapon, such as the Chain Gun, HyperBlaster or Rail Gun. Weaker weapons can leave you exposed to enemy fire for an uncomfortably long time and weapons with splash damage may do you more harm than whoever you're fighting. As always, keep an eye out for Strogg appearing from behind and above you.
Walkthrough[edit]
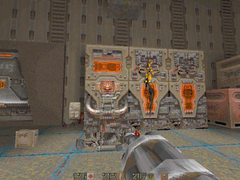
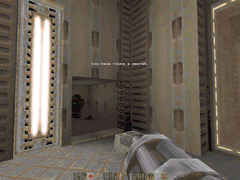
Step through the door from the Outer Hangar and you will find yourself high up in a large room with a big circular structure in the middle. One step more and a Gunner will come at you from the left, so be prepared for him. A second Gunner will come up a long flight of steps around the left side of the central structure. Now you have time to take stock. Steps go down both sides of the room. At the back of the area where you're standing are a row of large machines or equipment racks of some sort (see Secrets, below) and stacks of crates with some useful items on top. Down both sets of steps, in the far corners of the room, you can see more stacks of crates, the right-hand one looking invitingly climbable.
Clearing the First Room[edit]
Go down the left-hand side of the room first, until you see a Brain and a Berserker. You can pull back and take them out from cover if you want to preserve ammunition for your more powerful weapons. Come back up and go down the right-hand side for another Brain / Berserker pair. When they go down, keep going around the central structure towards the other set of steps and look up. Two Icarus will have appeared from a hidden alcove above the crates up at the top. When they are dealt with, turn around again because another hidden alcove will have disgorged two Berserkers. At this point, you can take a breather and collect any useful items lying around.
Shutting Down the Turbine[edit]
Go to the hatchway on the bottom level between the two stacks of crates. Through it there is a passage to a second hatchway and through that you come to a room with a rotating turbine blade below the floor. Jump into the airflow from the turbine to be blown up into the room above, but be prepared for the two Icarus that are waiting for you there. Strafe to get out of the airflow and push back the keyboard of the computer console to receive the message "Turbine shut down". On one side of the room there are crates stacked at a slightly lower level. A Berserker is hiding in there, so take him out. On the other side of the room is a wide window giving you a panoramic view of ... well, whatever it is that's out there.
Go down to the place where the crates are stacked, through a passage and out of a hatchway onto a balcony. You will probably be interested in the MegaHealth that is just innocently sitting there to the right. By all means take it, but equip a weapon suitable for a Berserker who suddenly appears from behind it. Clamber down the stack of crates to get back to the lower level. Should you ever want to get back up to the balcony, now that you can't ride the turbine's airflow, you can easily climb the stacked crates. Go through the hatchways and passage again and this time drop down onto the stationary turbine.

The Strogg Laundry[edit]
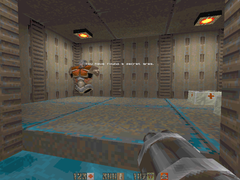
Leave the turbine room through the passage at the back. This leads to a room with a wall button, two sliding panels in the floor, and a Gunner. A second Gunner will step out of an alcove after you have dispatched the first. With them both out of the way, press the button to slide back the floor panels and look down into a circular tub partly filled with water and with a four-bladed paddle slowly rotating in it. This is obviously where the Strogg do their laundry, but fortunately today doesn't seem to be laundry day. Drop down onto one of the beams that cross the room above the tub. Optionally, jump to the edge of the tub or into one of the corners. Time your drop into the water so that you can get out through the exit tunnel without taking damage from the paddle. You can walk around the tub if you need to, keeping in between the paddle blades.
Once in the tunnel out of the laundry tub, you'll have to start thinking about the enemies in the next room, which looks rather like a partly-drained swimming pool. An Icarus will be descending from above and you can get to him from the cover of the tunnel. As soon as you advance from the tunnel, two Berserkers will come up from under the water. Be careful not to back up so far that you get hit by the paddles in the tub behind you. Look out next for Gunners coming from the pool edge up to the right and through the opening above the ramps straight ahead.
When things calm down, before you take the main exit in the middle of the wall at the top of the ramps, you can optionally explore the area to the right. You need to do this if you want to score all the enemy kills or go back for something you left behind, but otherwise you can just move on. Go up the right-hand ramp and U-turn to the right up some steps and onto the ledge above the pool. Go to the end and turn to the left through the opening into a short narrow passage. Look up and you will see a trapdoor in the ceiling. Go to the right but walk backwards so that you can take down the Gunner that will fall from the trapdoor. At the other end of the passage is an elevator platform. If you step on, it will take you up to the large room with the stacks of crates and you will find yourself in the corner behind the stack that is climbable. You can't return via the elevator (unless you plummet down and take fall damage), so take anything you need and follow the same path that you did the first time to get back to the pool again. You can also advance further in the level and still make it back here. Don't forget the ammunition backpack right by the door through which you entered the level.
Riding Sliding Blocks[edit]
Go through the opening between the ramps out of the pool (but, see Secrets, below, first). The passage beyond turns to the right and then to the left, but take care because when you reach the second turn two Berserkers will come out from a hidden alcove near the first turn. The passage comes out in a small room in which a cubical block slides to and fro in shallow water. Deal with the Icarus there. For the moment, disregard the block except to avoid getting smushed by it. Drop into the water and wade through the opening into a larger room with two more blocks and ... two more Icarus! When these are out of the way, you can think about what the blocks are for (but, see also Secrets, below).
Go back into the smaller room, being careful not to get crushed by the moving blocks, and take the steps back up to the platform from which you can jump onto the first block. Ride the block until it is next to the second block and jump over onto that. If you're not a platforming ace, you may want to do some quicksaving here. Ride the second block to the small alcove and jump off to press the button there. A ladder will rise out of the water so that if you fall off the blocks (no, of course you're not going to fall off the blocks, but just in case ...) you will be able to retry from this position. Also, the third block, which was not previously moving, will start doing so. Jump back onto the second block and wait for it to get to a favorable position with respect to the third block before jumping over to that. Ride the third block to the wide alcove and press the button.

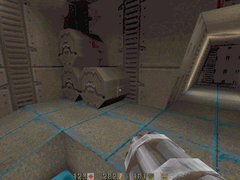
A series of platforms now comes down the right-hand wall and another lowers from the ceiling. Ride one of the blocks again to the wall platforms or jump directly over. Wait for the ceiling platform, jump on and ride it up. Turn 90 degrees to the right, step into the tunnel that leads away and at the end drop down into a tiny room in the middle of a room with two huge, slowly rotating gears. There is an Icarus floating about; you may be able to shoot him down without stepping outside. Then step out onto the upper gear. There is a Gunner on a ledge at your level, so take him out but try not to lose your footing. Now another Icarus will come up from below. Collect Health and ammunition at this level and carefully drop between the teeth onto the lower gear to collect the Power Shield. Look across at the opening out of this room and prepare to fight a Gunner lurking just inside. Go over on the gear or drop into the water and climb up the steps. The Gunner may come out to meet you. Inside the next room, there will be two more Gunners. Take the passage to the left by the far wall which will first disgorge a Berserker and then take you to a tee intersection. Look first around the corner to the left and fight the other Berserker. Then take the right branch of the tee to a left turn and take out the Gunner.
Worth noting, before you leave this area, is that in room with the rotating gears there is a path back to the room with the sliding blocks. Get back into the water and you will easily be able to find it. There is a wall button that you need to push to move some bars out of the way. By going back to the swimming pool and using the elevator in the passage off to the side, you can make your way back to the very first room to collect anything you didn't pick up before.
The Hornet Boss[edit]
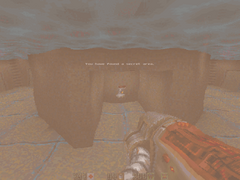
Finally, you will arrive at a room in which there is a large opening to a very tall, dimly lit, cylindrical space. This is the Main Hangar. Looking down, you can see water and a pier projecting from under you with a floor button on it. Looking up, you can see the main hangar bay doors that you are supposed to close but, more importantly, the Hornet Boss is dropping slowly down towards you. There are many ways to approach this boss battle. You can shoot at him as he descends and then use the sides of the opening for cover as you finish him off. If he gets off a round of Rockets and you don't dodge them, you'll take a lot of damage. At hard difficulty, it will take you 18 Rockets to down him, or 14 slugs from the Rail Gun or 5 blasts from the BFG10K. The most quick and economical weapon is probably the HyperBlaster, which will take only 100 hits.
Drop down onto the pier and go to the end to stand on the floor button (see also Secrets, below). A bridge extends over your head to link the room from which you fought the Hornet Boss to the other side of the Main Hangar. Go back along the pier and into the room under the bridge. Kill the Gunner lurking behind the machinery on the left and press the wall button back there to raise a ladder which will take you back up to the bridge level. Look around first for anything worth taking. You can vary the boss fight a little if you come down here when the Hornet Boss is on his way down. When he has followed you to this level, you can run back up the ladder and rain some Grenades down on his unsuspecting head.
Hangar Control[edit]

Cross the bridge that extended across the Main Hangar when you stepped on the floor button. On the other side, a curved passage takes you around to the left and to a very tall elevator. Press the call button, wait for the platform, step on and ride it up to Hangar Control where you will have to fight two Gunners. Ah, but look! There's a lever! Operate the lever and look up to see the main hangar bay door close. Your field computer will now show "First half of unit objective complete" and "Proceed to surface".
If you were to go back to the tall elevator, stand on the platform and press the button, you would go back down to the bridge level. From there, using the tunnel in the water in the gears room and the elevator in the side passage near the swimming pool, you could make your way right back to the start of the level. Just saying.
Getting to the Surface[edit]
There is a door out of Hangar Control, near the bay door lever, so go over and open it. Expect a Brain and a Berserker just on the other side. Go around the wall facing you to the other side of the room to meet the last enemy in the level, another Gunner. There is a large opening here ringed with pale yellow lights (if it is blocked by a force field, you've not yet closed the hangar bay doors, so go back and do that). Go in and through to a large elevator (but first see Secrets, below). Press the button to begin the journey up to the surface. (You will be able to come back down to this level if you wish.) As you rise, ponder this question : early in the level you looked out of a wide window and appeared to be quite high above some kind of military or industrial area; then you dropped down a short way, but since then you've ridden a high elevator upwards; so how is it that you're now below ground?
Secrets[edit]
This level has five (5) secrets:
- Just to the left of the door through which you enter there are three large machines or equipment racks of some sort. The middle one has a jagged crack in it and emits sparks from time to time. Shoot it. It will explode and you receive the message "You have found a secret". This may happen in the fight with the first Gunner, especially if you use Grenades or Rockets. In the space vacated by the machine you will find an Adrenaline.
- As you climb out of the rectangular pool after the laundry tub, look to your left and you will see three cylindrical canisters lying on their side. The rightmost one is cracked. Shoot it to receive the message "You have found a secret" and reveal a Quad Damage.
- In the large room in which two cubical blocks slide to and fro in shallow water, there is a small maze of underwater passages below the wide alcove where you press the second button, the one that lowers the platform from the ceiling. Dive down on the left-hand side as you face the alcove. Swim slightly to the left then turn immediately right, go to the end, take a left and surface to receive the message "You have found a secret area" and find Body Armor. There is other useful stuff in this underwater maze, but only the place with the Body Armor counts as a secret. You can use a Rebreather to stay submerged longer, but you don't really need it.
- Where you fight the Hornet Boss, there is a short pier out into the water at the bottom of the room with the floor button that extends the bridge. At the very end of the pier, get into the water and dive to find an alcove. When you go in, you receive the message "You have found a secret area". There is an Adrenaline in there.
- In the very last room, after Hangar Control, look to the left of the opening through which you go to the elevator and leave the level. The crooked panel in the wall explodes when shot to reveal Body Armor. You receive the message "You have found a secret".
- Gallery : Secrets in the Inner Hangar Level
-
The cracked and sparking machine.
-
The cracked canister by the pool.
-
The Body Armor secret area.
-
The Adrenaline secret area.
-
The Body Armor by the exit elevator.


